Help Centre › For accountants
Client checks (AML)
8 steps · 5 min · Updated 3 November 2026
Before you start
- The Practice add-on is on: Add-ons.
- Have the client's ID and proof of address ready (scans or photos are fine).
- Open the client file. In the box on the right, under Client, open Client checks (AML) and press Start client checks.
- Go through the six steps: Client type, Identity details, ID checked, Purpose of the relationship, Risk assessment and Sign-off. You see how many are done, for example 3 of 6.
- For a limited company, add the company number: the registered office, directors and owners come from Companies House by themselves. Each person still needs an ID check.
- At ID checked, choose how you saw the documents (in person, by post, certified copies, video call) and upload the scans.
- At Risk assessment, answer the questions. Any Yes raises the risk. High risk adds extra checks before sign-off.
- Tick that you checked the official UK sanctions list, then press Sign off.
- Need the client to send ID? Press Email the client how to send ID.
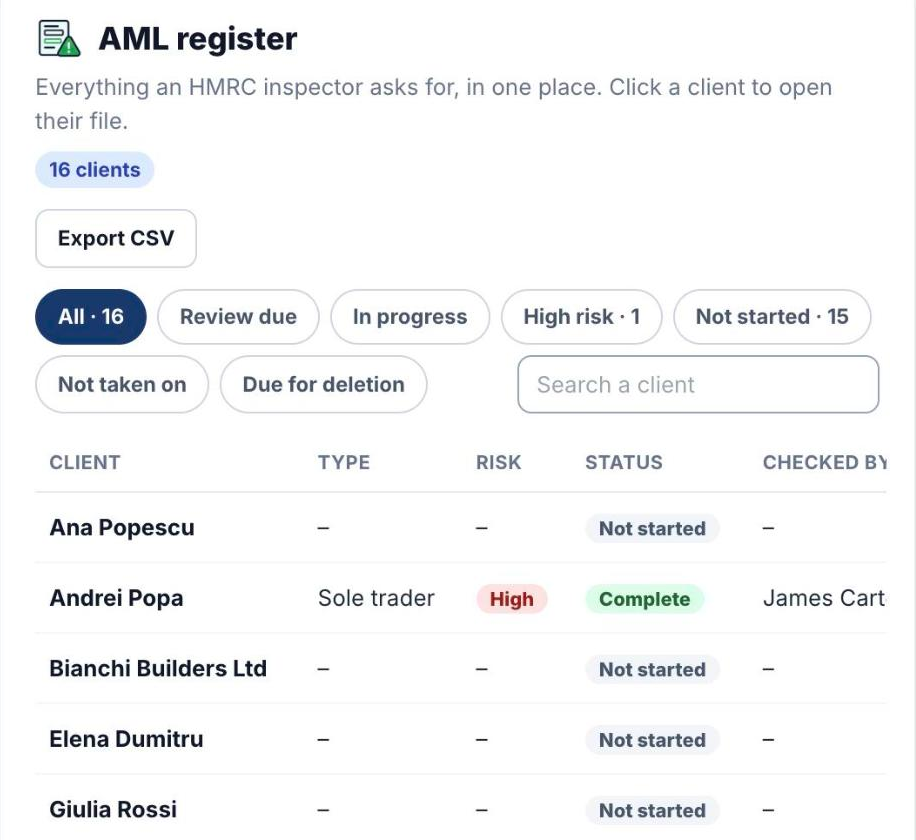
- To see every client at once, press AML register: type, risk, status, who checked, date and next review. Press Export CSV for a copy.
Good to know
- You should not start work until the checks are complete.
- High risk or politically exposed person (PEP): only someone allowed in Settings → Client checks (AML) can sign off.
- Reviews that are due also appear in your Monday email.
Was this helpful?Still stuck?or email support@taxeaseuk.com